
A perfectly optimized image file is both lightweight and sharp. Surprisingly, many factors influence the “weight” or file size of an image, so simply changing the image dimensions is often not enough. However, it is still better than doing nothing.
Images should always be edited before uploading them to a website. Although the media library offers some tools for editing, they typically don’t perform exactly as needed.
Let’s go through the optimization process with an example image. I have some summer photos taken by Jenni Oranen, and I want to use one of them as a featured image on my website. I have the image in full resolution, so I can use it for print products if necessary.
The starting point of our example image:
- Width 6016 px
- Height 4016 px
- File size 16,9 Mt (16 900 kt)
- Resolution 310 dpi

The most important information about an image file is visible when you hover your mouse over the file in the file explorer. You can get more details by right-clicking the image and selecting “Properties.”
For example, you will see the following information:
- Image file size (weight)
- File type
- Image dimensions
- Image resolution
All of the above affect how the image works on your website. Let’s go through each point individually and optimize the example image as we go. At the end of the article, you’ll find a list of tools you can use for image optimization.
Image file size (weight)
In my opinion, file size is the most important attribute of an image. You can’t change it directly; instead, the size changes by editing other aspects of the image. After making adjustments, image files can still be compressed.
Our example image has a whopping file size of 16.9 MB, or 16,900 KB. I usually advise my clients to aim for a size under 200 KB. An occasional full-screen striking image can sometimes weigh up to 400 KB, but that’s already pushing it. The lighter the image, the better!
File size affects how quickly or slowly a page loads for the visitor. Early internet users may remember how images would load onto the screen one pixel row at a time. Even though internet speeds have improved, there are still sites where this row-by-row effect occurs, signaling that the page contains a massive image file.
A large file size does not guarantee sharpness or an amazing visual experience. Screens can only display a certain number of pixels, and any extra pixels are wasted and stripped away. The larger the files that are loaded every time a page is viewed, the more it strains the visitor’s internet connection and the company’s hosting servers. A well-timed visitor spike can cause the entire site to crash if bandwidth is eaten up by loading huge images.
File type
There are several image file types available, but only a few are necessary for websites.
- JPG / JPEG: The recommended file type for all images. JPG / JPEG is lightweight and works on all screens. Any transparent parts will turn white when the file is converted to JPG / JPEG.
- PNG: High-quality image. Used when transparency is needed. The file sizes are often considerably larger.
- WebP: A lightweight file developed by Google, but it doesn’t work on all devices, such as certain Apple products. Image conversion is usually handled server-side, determining which format to serve based on the device.
- GIF: Widely used on social media for small moving images and animations. Can be used on websites if needed, but for static images, it’s better to choose one of the above options.
- SVG: A vector-based image, often used for logos, icons, and other graphics.
- PDF: Not an actual image file format, but sometimes a version of a logo or graphic provided by a designer. To use it on a website, it needs to be converted to an image file format.
As a rule of thumb, choose the file type that provides the smallest file size while achieving the desired result. For standard images that span the full width of the screen, JPG / JPEG works best, and if the image contains transparency, choose PNG.
Our example image is already in JPEG format, so no need to change the file type. I tested converting it to PNG, and the file size became 35.9 MB (compared to 19.6 MB in JPEG format).
Image dimensions
Image dimensions refer to the width and height of the image. They could be expressed in centimeters or millimeters, but since the image is displayed on a screen, the unit used is pixels (abbreviated px).
The size of the image is relative to the average screen size. A full-width image on a website is generally a maximum of 2048 px, but with increasing screen sizes and resolutions, larger pixel counts are sometimes needed. However, these large displays represent a small percentage of site visits (unless your audience specifically prefers large screens), so you should weigh whether increasing dimensions at the cost of loading speed is necessary.
The width and height of the image are determined by how the image is placed on the site.
If the image is too large for its designated space, it is resized to fit. Any excess file size is just wasted and only slows down the loading process.
On the other hand, if the image is too small, it will appear undersized or pixelated when stretched to fill the designated space, depending on the settings.

Product and article images
If the image is being used as a featured or product image (i.e., a shareable image), check the recommended and minimum dimensions for the channel. A common guideline is that the image should be at least 1200 px wide, ensuring it works well for Facebook shares and Google services.
Image resolution
Resolution, or DPI (dots per inch), refers to the number of pixels per inch. For print products, a resolution of over 300 dpi is common, and unprocessed images from digital cameras are typically in this range.
However, screens display at less than 100 dpi, with 72 dpi being a widely used standard. This means that even if your image has twice or three times as many pixels, they won’t be visible, and any extra pixels just increase the file size unnecessarily, slowing down image loading.
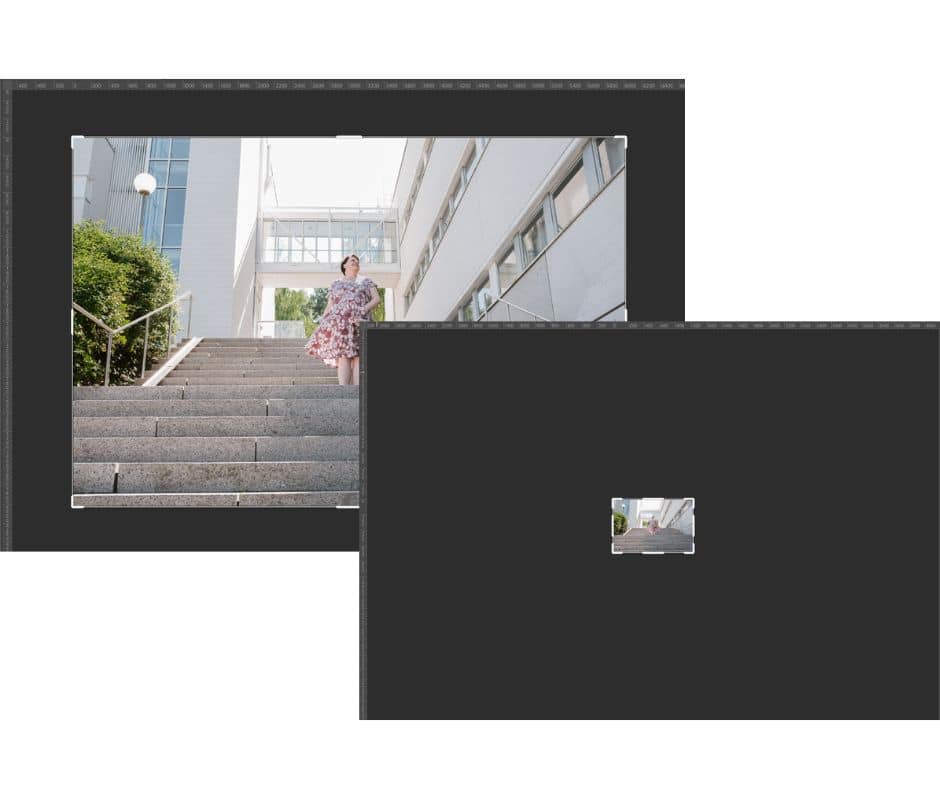
Our example image had dimensions of 6016 x 4016 px, about three times too large for the average screen, with a resolution of 310 dpi.
Since the image will be used in a spot covering half the width of a computer screen (2048 px / 2) and almost the full width of mobile and tablet screens (max 1080 px), a width of 1024 px and resolution of 72 dpi will suffice.
After resizing, the file size of our example image is 783 KB, so we’ve already cut down a significant portion of the file size. However, there’s still too much weight.
Compressing the image file
Compressing an image file removes the last unnecessary kilobytes. A good tool preserves the image’s quality while reducing file size.
I usually save images using Photoshop’s “Save for web” function, and after that, I run the image through TinyPNG (see the list of tools).
After Photoshop, our example image was reduced to 236 KB, and after TinyPNG, the final version came out to 177 KB. The file size is now about 100 times smaller than when we started.
The final version of our example image:
- Width 1024 px
- Height 684 px
- File size 177 kt (0,18 Mt)
- Resolution 72 dpi
Naming image files
As convenient as it is to just click “Save” after making edits, I recommend saving the image with a name that will be helpful in the future. I admit I often fall into the habit of mindless saving, too.
Here’s how naming your images helps:
- SEO: The image name plays a role in search engine optimization. It’s a good idea for the image name to reflect the content and purpose of the image.
- Finding the image: I often encounter situations where I need to add a logo to email settings, for example, in an online store with hundreds or thousands of product images. Browsing the media library can be frustratingly slow, but if I’m lucky, I can find the logo by typing “logo” into the search bar. When the image name is descriptive enough, it’s easy to find even years later.
- Accessibility: While screen readers mainly use alt text for images, they sometimes also pick up image file names. A file name like IMG200003442-2.jpg doesn’t provide much information about the image’s content or purpose.
Why doesn’t the image change, even though I’ve replaced it?
If you’ve already uploaded a version of the image to the media library and are trying to replace it with a new version, you’ll need to give the new image a slightly different name than the previous version each time.
WordPress has a feature that keeps the original media file visible, even if the image has been deleted from the media library and replaced with a new one, but with exactly the same name. You can use numbering (e.g., nice-image-v3.jpg) or create new names or suffixes for the image files.
Tools for editing images
If you work with a lot of image editing, for example, for an online store, I recommend investing in a good and efficient tool. The licensing fee is well worth it for smooth and fast processes, and you won’t need to spend time switching between several tools.
Image editing programs
There are plenty of image editing programs available. Here are the three I personally use:
Photoshop: A professional-grade tool that allows you to resize and adjust the resolution of images, as well as compress the image file for the web. You can also record macros to edit large numbers of images quickly and efficiently. The most important functions can be found under Image -> Image Size (resize and resolution) and File -> Export -> Save for web (compression).
Price: starting from €25.09/month. Link to Adobe subscription pageCanva: An online, versatile design tool that can also be used for image editing. You can bring your images into a ready-made template, and the size is automatically adjusted according to the template. The most important tools are Resize and Share -> Download -> Size OR Limit file size (Pro feature).
Price: free with limited features, Pro starting from €110/year. Link to Canva homepagePhotoScape: A highly versatile image editing tool, especially for a free program. The most important functions are found under Resize (image size) and Save (resolution and compression).
Price: free. Link to PhotoScape download page
You can find more free alternatives and tools for editing images via Google search.
Compressing images
As I mentioned earlier, the panda (TinyPNG) is the mascot of one of my most important tools.
Tinify / TinyPNG: An easy-to-use online application that squeezes out all the invisible and unnecessary weight from image files without sacrificing quality. I run all the images I upload to websites through TinyPNG as the final step.
Price: free, Pro membership for higher upload amounts starting from $39/year. Link to TinyPNG websiteCompress JPEG: I haven’t used this personally, but many colleagues recommend it, so it probably works just as smoothly as TinyPNG. A quick test on the example image compressed it to 207 KB (compared to TinyPNG’s 177 KB), so there’s only a slight difference.
Price: free. Link to Compress JPEG website
There are many other tools available for this task, easily found via a Google search.


Sivutaikuri's Tip
If needed, I can install a plugin on your site that automatically limits the size of large image files to predetermined dimensions. This way, you can avoid accidentally clogging up your site with oversized images.